
|
TOPICS |
| Blackberries |
| Bread Baking |
| Butterflies (& Moths) |
| Crafts |
| Christmas |
| Crochet |
| DIY |
| Games & Puzzles |
| Gardening |
| Juicing |
| Knitting |
| Pets |
| Selling Online |
| Spider Solitaire |
| Webmaster Stuff |
| Writing |
KNIT A WASTE BASKET COVER |
Call them wastebasktet skirts, scrunchies, bands, or liner covers, they're quick, easy, & fun to make. Contributions welcome. |

We just remodeled our bathroom (photos coming soon). The bathroom wastebasket was still an eye-sore, with its grocery bag liner hanging out, so I came up with this solution.
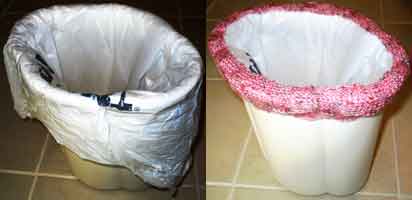
I used size 7 needles and 4-ply acryllic yarn for the first one. Most any washable yarn will do, but choose something with a little spring to it, since you'll be stretching it over the top of the wastebasket.
I chose a checkerboard pattern to add a little interest, but it comes out fine if you just knit away (garter stitch) or experiment with something fancier, like a popcorn-type stitch. I wouldn't advise getting too carried away with anything complex because this is a wastebasket, not the focal point of a room. Most people won't even look at it, let alone notice a complex knitting pattern.
It doesn't take much yarn--less than half a skein.
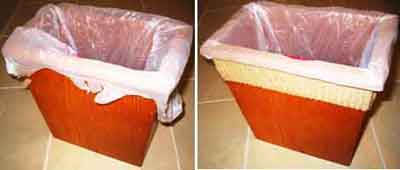
For my second project, I used sport-weight yarn and a simple garter stitch. This was for the wastebasket in the den that has a lip, so I put the band underneath the lip instead of around the top.
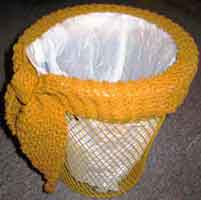
For my third project, I made a sash and tied a square knot in it. This one's my fave.
Add a few squirts of your favorite fabric freshener, essential oils, or cologne to make it smell nice.
This is a great way to use up the leftovers from an afghan project--matching wastebasket bands for the same room.
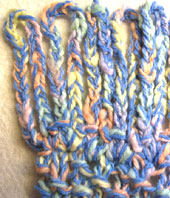 CROCHET FRINGE
BACKGROUND IMAGES |


Susan Molthop
All Rights Reserved