
|
TOPICS |
| Blackberries |
| Bread Baking |
| Butterflies (& Moths) |
| Crafts |
| Christmas |
| Crochet |
| DIY |
| Games & Puzzles |
| Gardening |
| Juicing |
| Knitting |
| Pets |
| Selling Online |
| Spider Solitaire |
| Webmaster Stuff |
| Writing |
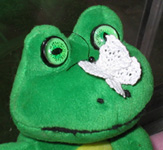
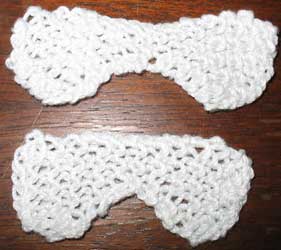
KNIT A BUTTERFLY |
This butterfly is knit in 2 pieces, starched, ironed, and stitched together. Contributions welcome. |

 Directions:
Needle
Size: #1
Crochet Cotton
Sometimes it's hard to tell where you are on something this small, so here's a hint. Watch the tail of your thread. When you're knitting away from the tail, you'll always be on a knit row. When knitting toward the tail, you'll be on an increase or decrease row. (The only exception is the 3 knit rows for the body.)
Top
Section:
Cast on 4 stitches
Row 1: K3, K front & back of next stitch
Row 2: Knit across
Row 3: K4, K front & back of next stitch
Row 4: Knit across
Row 5: K5, K front & back of next stitch
Row 6: Knit across
Row 7: K5, K2 together
Row 8: Knit across
Row 9: K4, K2 together
Row 10: Knit across
Row 11: K3, K2 together
Row 12: Knit across
Row 13: K2, K2 together
(body)
Row 14, 15, 16: Knit across
(wing)
Row 17: K2, K front & back of next stitch
Row 18: Knit across
Repeat rows 1-11
Bind off
Bottom
Section
(wing)
Cast on 5stitches
Row 1: K4, K front & back of next stitch
Row 2: Knit across
Row 3: K5, K front & back of next stitch
Row 4: Knit across
Row 5: K5, K2 together
Row 6: Knit across
Row 7: K4, K2 together
Row 8: Knit across
Row 9: K3, K2 together
Row 10: Knit across
Row 11, 12, 13: Knit across
(wing)
Row 14: K3, K front & back of next stitch
Row 15: Knit across
Repeat rows 1-7
Bind off
Work in the ends. Press, using *fabric stiffener.
Layout the wings with the straight edge up and the lower wing overlapping the upper wing, so the lower wing is on the outside.
Tack the wings together so they don't separate.
Fold the wings together, so it looks like a butterfly with its wings closed, and stitch a small seam down the middle, so you can position the butterfly without the wings flopping down flat.
I used heavy-duty thread for the antennae, but you might find something better.
I didn't make a body, but if you want to try that, skip the seam step until you see how the body works out. Now all you need is a flower for your butterfly to perch on.
* If you don't have fabric stiffener, I've heard you can make it from white glue diluted with water. You can also take equal parts sugar and water and heat it until it dissolves. I'm not sure if you can iron either of these, so you might want to press the wings, first, then dip them in the homemade stiffener and lay them out to dry. I HAVE NOT TRIED THESE RECIPES, so you might want to experiment, first.
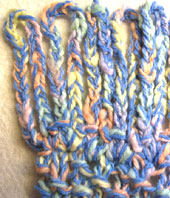 CROCHET FRINGE
BACKGROUND IMAGES |


Susan Molthop
All Rights Reserved