|
TOPICS |
| Blackberries |
| Bread Baking |
| Butterflies (& Moths) |
| Crafts |
| Christmas |
| Crochet |
| DIY |
| Games & Puzzles |
| Gardening |
| Juicing |
| Knitting |
| Pets |
| Selling Online |
| Spider Solitaire |
| Webmaster Stuff |
| Writing |
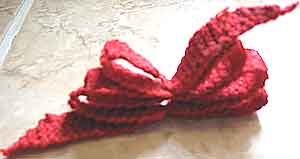
KNIT A BIG BOW |
Make a fancy bow to put on special gifts. It also makes a great cat toy, Christmas corsage, or ponytail decoration. Contributions welcome. |

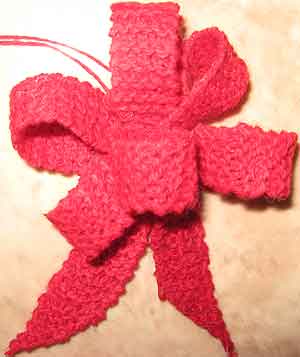
Instructions for a Fancy Hand-knit Bow
This project uses fine yarn, about the weight of crochet cotton, and size 1 needles.
Directions:
Cast on 1 stitch
Increase: (This gives you the pointed end of the ribbon.)
Row 1: Knit the front and back of each stitch
Row 2: Slip the first stitch (to make a smooth edge), knit the front and back of the 2nd stitch
Row 3: Slip the first stitch, then knit the rest of the row.
Row 4: Slip the first stitch, then knit until you get to the last stitch. Knit the front
and back of the last stitch.
Repeat rows 3 & 4 until you reach your desired width. (The bow in the photo is 5/8" wide--6 stitches.)
Pattern: Knit in standard garter stitch until your work measures about half the width you want for your finished bow. Do not include the pointed end in your measurement. (The bow in the photo measures 1 1/2" at this stage.)
Indent: Knit 2 together at the beginning and end of the next rows until you have 2 stitches left on your needle. Knit the front and back of one stitch at the beginning and end of the next rows until you're back to the same number of stitches you started with.
Continue knitting in standard garter stitch until your work measures the full width you want for your finished bow. (Remember to slip the first stitch of every row.) Do not include the pointed end in your measurement. (The bow in the photo measures 3" at this stage.)
Repeat from the "indent" 8 times. (I quit at 6 and didn't like the results.)
Decrease
Start the decrease round from the long side of your work.
Row
1: Slip the first stitch. Knit until you reach the last stitch. On the last stitch,
knit 2 together.
Row 2: Slip the first stitch, then knit the rest.
Repeat until you have one stitch left. Cut the yarn and pull through
the last loop. Pull it tight and snip the end, or work it back in with
a crochet hook.
Finishing: Iron your ribbon, flat, using starch, sizing, or light fabric stiffener. Let dry completely. Fold your ribbon back and forth, lining up the indents.
Tie, tightly at the indents. Twist the loops until the bow looks the way you want it. DONE!
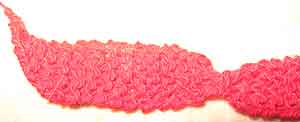
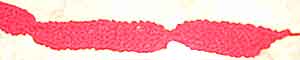
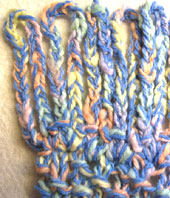 CROCHET FRINGE
BACKGROUND IMAGES
|


Susan Molthop
All Rights Reserved